Homebrewing: Discover the Magic of Craft Beer by Making Your Own
The Australian alcohol landscape has certainly been transformed over the recent years thanks to the variety of craft beers emerging around the country, so you have a wide range to pick from at local breweries. However, making your beer would help you truly immerse in the world of craft beer, providing you with the hobby of a lifetime, besides letting you reap the benefits of the healthy drink.
Source: lovethegarden.com
As the year of 2020 was weird to say the least, it changed the way we look at our day to day lives. Faced with the uncertainty of COVID-19 pandemic, and the lockdowns and social distancing, many of us got to spend more time at home. This resulted in the great interest in finding that hobby that would make for quality time spent in isolation. Homebrewing your own beer would certainly make for a fun and challenging one at the same time.
Getting Started with Equipment
As a beginner, you may be wondering how to begin with the hobby or which ingredients to acquire, as well as tools. Before you know it, confusion ensues and you’re left thinking it’s too much trouble. Fret not, the solution lies in purchasing a perfectly constructed beer recipe kit consisting of everything you require to get started in a breeze, in the likes of hops, malts, brew enhancers and yeast.
If you aren’t sure about the recipes, some specialised shops offer you the chance to find your desired kit by answering short questionnaires related to the ingredients, aromas and flavours you most prefer. Now, in case you’re also having trouble deciding on the required equipment, there are starter kits that include the tools besides the recipes.
This includes fermenting barrels with taps, airlocks and thermometers, hydrometers and test flasks, bottling valves, super auto bench capper, mixing paddles, carbonation drops, brew sanitisers and cleaners. If you don’t have your bottles and caps, you might have to buy them too along with the rest. And to further make things simple and easy for you, the resourceful kits come with a set of instructions for you to follow.
Source: nytimes.com
Following the Brewing Steps
Once you’ve done your shopping for the ideal beer recipe kit and acquired each and every piece of equipment, it’s time to decide on where you’re going to be brewing. Besides making sure you have plenty of clean working space for the equipment bits, like a kitchen or garage workbench, you also require access to cold as well as boiling water. When you’ve got it all settled in the ideal area, it’s time to follow the instructions.
Do the Cleaning
If you want your brewing to be a success, and your beers to be tasty, you can’t skip this important step. Using the sanitisers and cleansers that come with the beginners’ kits, you have to ensure there’s no bacteria on any part of your brewing equipment, be it the mixing paddles, the fermenting barrels, the thermometer and hydrometer, or the bottles. Let them all soak for about 10 to 15 minutes for thorough sterilisation in the fermenting barrels. Once this is done, rinse well with water, drain well, and you can move to the next step.
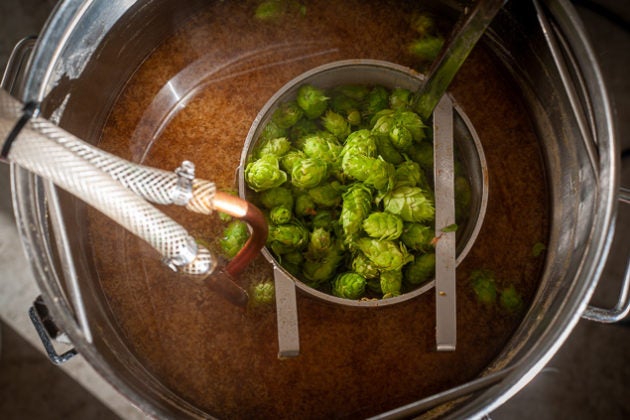
Preparing the Malt
As part of the homebrew recipe kits, the malt is the basic ingredient you begin with. For easy fermenting, it’s advisable to prep the malt extract by placing it in a pot of boiling water along with the tin it comes in. Letting it sit for a while, you should also boil up about three litres of water.
Then you can move on to adding it in the fermenter, along with the extract malt, and stir them well with your sterilised paddles. If you’d like to enhance the taste and flavour with something better than your regular sugar you use at home, it’s time to add beer enhancer or brewing sugar which is much finer.

Source: pinterest.com
Watering and Yeasting Up
Once your wort is ready, the next step you’d have to cover is diluting it by filling up the barrel with cold water to get to the desired five gallons that are the recommended dose on your beer recipe kit. The reason this is the ideal has to do with the fact if you add more, you dilute it too much and ruin the taste, and if you add much less, you risk making your beer too alcoholic.
If you aren’t sure about the quality of your tap water, specifically the pH, it’s recommended you check with a pH meter. And in case it’s not ideal, you can opt for bottled or filtered water. Before moving on to adding the yeast, use the thermometer to see if the temperature is in line with that in your instructions (usually 18 to 23 °C).
To be certain of fermentation going according to plan, never add the yeast in boiling wort. If you can’t wait for fermentation to add the hops, add them right after the yeast, then close the fermenter firmly along with the airlock with water inside, and be patient as the process happens over the next week or two (depending on how much you’re willing to wait) before you can bottle it up. Be sure to pay attention to the fermentation by checking with the hydrometer.