PreSonus StudioLive III Review
PreSonus introduced the next generation of StudioLive mixers in 2019. They continue the dual-purpose trend of previous consoles, which means they can be perfectly used both in the studio and in the home, as they’re an all-in-one audio interface control console that can be used in pretty much all audio-related situations. The basic question has always been whether or not the StudioLive Series III is as good as a dedicated controller, and whether or not they’re a justified purchase. They’ve been a popular brand of audio tech for several years now, so let’s dive in.
Features
The StudioLive III is an excellent device that’s intended to replace the entire studio setup with a single studio station. That means it comes with a plethora of features that are all very useful to have, such as:
- SD Card recorder for capturing events on the fly.
- A Flex DPS engine that’s capable of running 286 simultaneous processors, 26 mix busses, and 40 mixing channels.
- USB 2.0 Record and playback up to 64 channels.
- Virtual soundchecks over the SD card reader.
- XMAX preamps that are fully recallable.
- 25 Faders that are ultra-sensitive to touch that allow mixing with extreme precision.
- Advanced scene management.
- 16 Flex mixes that can be utilised like aux mixes, subgroups, or matrix mixes.
There are plenty of other features that come with the StudioLive III, making this PreSonus station incredibly worthwhile. In short, you can’t go wrong picking this station based on its features and you’ll definitely be very satisfied.
Connecting it to a Computer
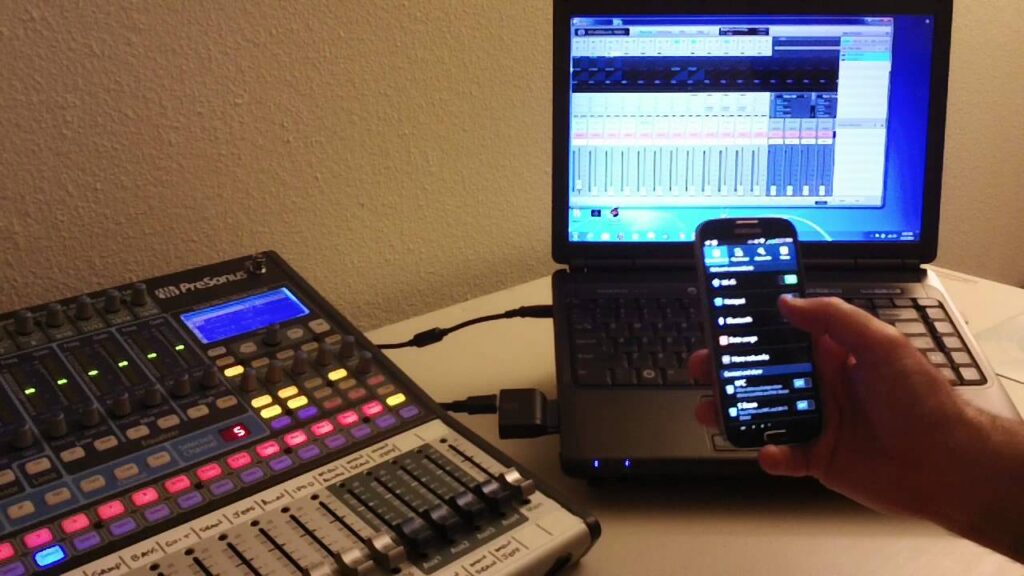
Like other similar PreSonus audio equipment, the StudioLive III is also very easy and straightforward to hook up onto the computer. In case the manual wasn’t clear enough, or you just want a reminder on how to, here are the instructions on how to connect it to a computer:
- Connect the device to the computer via USB and Ethernet.
- Download the Universal Control program from the PreSonus website, and then run it to ensure that the connection is live and stable.
- Start Studio One and a song that you’re going to use the device to control with.
- Press the UCNet button on the device. You’ll see a dropdown menu where you’ll need to find Studio One. You can scroll down the menu with the encoder below the display if you need to.
- Click on the Studio One Option with your finger on the display.
- Press the green DAW button next to UCNET and you’ll immediately the faders come to life.
Display
The PreSonus LiveStudio III’s display is nothing short of amazing. It features colour coding on pretty much all control surfaces and faders, unlike in the past when you only had colours around the DAW. You can very easily customise these colours to your preference, which will definitely improve your productivity once you set them up as you most prefer. The display is also a touchscreen, which means you’ll have even greater access than before. You can customise the channels, include plug-ins, and even automate everything right from the display.
Metering
Initially, you might be a little disappointed when you start looking for metering. However, that’s not exactly the case because you need to do a bit of digging. It’s a small hassle, true, but the device actually provides a lot of capabilities in this department. There is a basic three-tier meter above each fader, which is great if you want to do some quick level referencing. For higher definition metering, you can go to the Fat Channel section where you’ll find a 12 tier meter. To view left and right metering, you can find a fluid meter on the touch display. On top of that, there’s a dedicated Main Meter on the console itself for quick main monitor referencing.
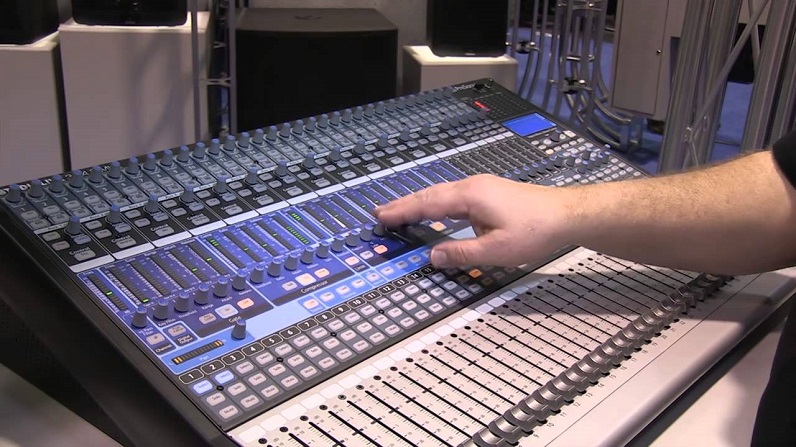
Faders
When you’re using the faders on any console, the last thing you want to do is for them to feel cheap and non-responsive. Cheap-feeling faders can simply make the entire experience significantly lesser, even if everything else works as intended. Luckily, that’s not the case with StudioLive III. The faders on this console are touch-sensitive, motorised, capacitive faders that feel quite responsive. There is a tiny bit of input lag when you’re using them, but it’s not a big issue and you’ll get immediately used to it.
Ins & Outs
The console comes equipped with 24 XLR inputs, 12 of which are standard XLR connectors. If a jack is inserted, it will disconnect the XLR input and bypass the preamp stage. It has an extra talkback mic input, as well as its own XMAX preamp with permanent phantom power applied, and the flexible routing options mean that it can be used as another mic input, in case you need it at the moment. You also have separate monitor mix output when you want to do some control-room listening. These outputs can be very useful for sharing the headphone mix via an external amp if you need to. This means the analogue outputs are well taken care of. On top of that, these controls are neatly tucked away so they won’t attract any extra attention. The console also comes with 16 extra outputs, and they’re placed on jack and XLR connectors on the back panel. Its sockets are of high quality, which means they won’t jam anytime soon.